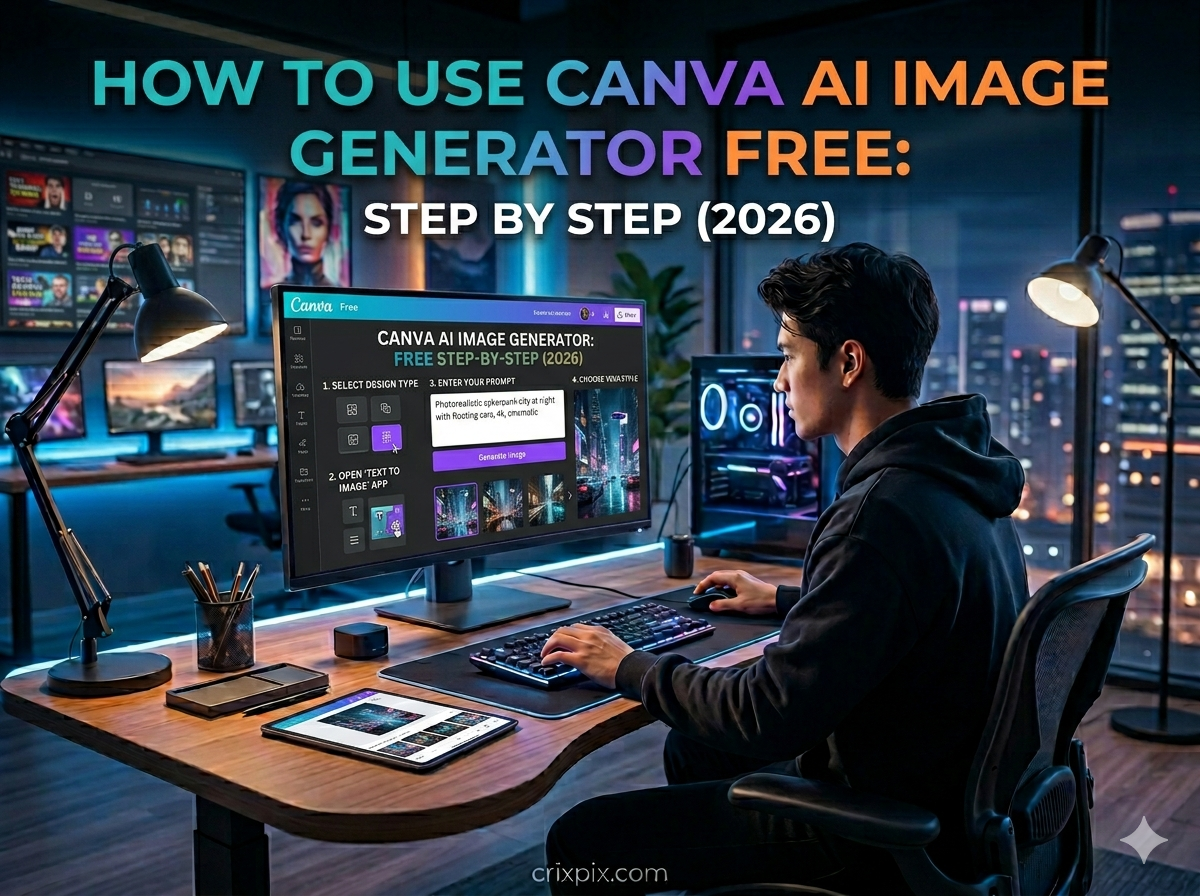
How to Use Canva AI Image Generator Free (Step by Step 2026)
Want to know how to use Canva AI image generator for free in 2026? You are in exactly the right place. Canva has three powerful AI image tools built in — Magic Media, Dream Lab, and DALL·E — and most people only know one of them. In this complete step-by-step guide, we walk you through all three, show you exactly where to find each tool, how to write prompts that actually work, which styles produce the best results, and the pro tips that turn average outputs into stunning visuals. No design experience needed.
📋 Table of Contents
- What is Canva AI Image Generator?
- The 3 AI Image Tools Inside Canva
- Step 1 — Create Your Free Canva Account
- Step 2 — Open Magic Media (Main AI Tool)
- Step 3 — Write Your Prompt
- Step 4 — Choose the Right Style
- Step 5 — Set Aspect Ratio & Generate
- Step 6 — Edit Your Generated Image
- Step 7 — Download & Export
- How to Use Dream Lab (Advanced)
- Prompt Formula + Real Examples
- Free vs Pro — What You Actually Get
- 8 Pro Tips for Better Results
- Frequently Asked Questions
What is Canva AI Image Generator?
Canva AI image generator is a built-in set of AI tools inside Canva that turns your text descriptions into custom images in seconds. Instead of searching for stock photos or hiring a designer, you simply type what you want to see — and Canva’s AI creates it for you.
What makes Canva’s AI image generator different from standalone tools like Midjourney or Leonardo AI is the all-in-one workflow. You generate an image and immediately drop it into a social media post, YouTube thumbnail, presentation, blog graphic, or flyer — all without leaving Canva. No exporting, no importing, no juggling multiple apps.
The 3 AI Image Tools Inside Canva (2026)
Most people only know about one Canva AI image tool. But in 2026 Canva has three separate AI image generators, each with a different strength. Here is exactly what each one does:
1. Magic Media (Text to Image) Main Tool
Free Plan Included Use 80% of the Time Powered by Stable DiffusionMagic Media is Canva’s core native AI image generator, powered by Stable Diffusion. It is the tool you will use for the vast majority of your image generation. You type a description, pick a style, set your aspect ratio, and click Generate — Canva produces 4 image options from a single credit. It handles everything from photorealistic images to illustrations, watercolour art, neon designs, and cinematic visuals. Available on the free plan with 50 monthly generations.
2. Dream Lab (Advanced Generator) More Control
Canva Pro Feature Higher Quality OutputDream Lab is Canva’s advanced AI image generator with significantly more upfront control. You access it directly from the Canva homepage (not inside a design). It lets you define style, dimensions, and image intent before generating — and produces noticeably higher-quality results than Magic Media for complex scenes. It is a Canva Pro feature, included with the $15/month subscription.
3. DALL·E by OpenAI Photorealism
Available in Editor OpenAI PoweredDALL·E by OpenAI is available inside the Canva editor under Apps. It uses OpenAI’s image model to generate highly photorealistic images from text prompts. When you need an image that looks like a real photograph — product shots, people, food, environments — DALL·E consistently outperforms Magic Media in realism. Also available: Imagen by Google Cloud for an additional option.
Step 1 — Create Your Free Canva Account
Sign Up for Free at canva.com
- Go to canva.com in any browser
- Click “Sign up” in the top right corner
- Choose to sign up with Google, Apple, Facebook, or email — all free
- Canva will ask what you plan to use it for — select Personal or Content Creator
- You are now inside your Canva dashboard — free account active with 50 AI generation credits per month
Step 2 — Open the Canva AI Image Generator (Magic Media)
Access Magic Media Inside Your Design
- From your Canva dashboard, click “Create a design” (top right)
- Select your design type — for example: Instagram Post, YouTube Thumbnail, Presentation — or enter custom dimensions
- You are now inside the Canva editor
- Look at the left sidebar — click “Elements”
- Scroll down until you see “AI Image Generator”
- Click “Generate your own” — the Magic Media panel opens on the left
- You will see three tabs at the top: Images, Graphics, Video — stay on Images
Step 3 — Write Your Prompt
Enter a Detailed Text Description
- In the Magic Media panel, find the text description box at the top
- Type a description of the image you want to create
- Canva recommends a minimum of 5 words — but more detail always gives better results
- If you are stuck, click the “Inspire me” button — Canva suggests example prompts you can use or modify
- Do not worry about being perfect — you can regenerate as many times as you want within your credit limit
Here are some example prompts to copy and try immediately:
A futuristic city skyline at night with neon lights reflecting on wet streets, cinematic, 4K
A minimalist home office setup with a laptop, plants, and soft morning light, clean aesthetic
Step 4 — Choose the Right Art Style
Below the prompt box in Magic Media, you will see a Style dropdown menu. This is one of the most important settings — it changes the entire visual feel of your generated image. Here is what every style produces:
Step 5 — Set Aspect Ratio and Generate
Choose Dimensions and Click Generate
- Below the style selector, find the Aspect Ratio dropdown
- Choose the right ratio for your use case:
- 1:1 — Square (Instagram posts, profile pictures)
- 16:9 — Landscape (YouTube thumbnails, presentations, blog headers)
- 9:16 — Portrait (Instagram Stories, TikTok, Pinterest)
- 4:3 — Standard (general blog images, Facebook posts)
- Click the purple “Generate Image” button
- Wait 5–15 seconds — Canva produces 4 image options from 1 credit
- Click any of the 4 images to add it directly to your design canvas
- If none of the 4 work, click “Generate again” (uses another credit) or refine your prompt first
Step 6 — Edit Your Generated Image in Canva
Once your AI-generated image is on your canvas, Canva gives you powerful editing tools to refine it — all for free. Here is what you can do:
- Crop and resize — Click the image → drag the corners to resize or double-click to crop to a specific area
- Apply filters — Click the image → click Edit Image → choose a filter to change the mood and colour tone
- Background Remover — Click Edit Image → BG Remover — removes the background with one click Pro feature
- Magic Edit — Select any part of your image and describe what to change — Canva’s AI replaces just that area Pro feature
- Magic Eraser — Paint over any unwanted element and Canva removes it from the image Pro feature
- Add text overlays — Add bold text, headlines, or captions directly on top of your generated image using Canva’s text tool
- Generate more like this — Hover over any of the 4 generated options → click the three dots → select “Generate more like this” to get 4 new variations in a similar style
Step 7 — Download and Export Your Image
Download Your Finished Image
- Once your design is complete, click the “Share” button in the top right corner
- Click “Download” from the dropdown menu
- Choose your file format:
- PNG — Best quality, transparent background support — recommended for most uses
- JPG — Smaller file size, good for web use and blog images
- PDF — Best for print materials
- WebP — Fastest loading for websites Pro
- Click the purple “Download” button — your image saves to your device
- All your designs are also auto-saved to your Canva account in My Projects
How to Use Dream Lab — Canva’s Advanced AI Generator
Dream Lab is Canva’s more powerful second AI generator — and most users have never heard of it. It lives on the Canva homepage, not inside a design editor, and gives you significantly more control over the output. Here is how to access and use it:
Accessing Dream Lab on Canva
- Go to the Canva homepage (not inside a design — click the Canva logo to go back)
- Look at the top search bar — click it
- You will see a “Create an image” option appear — click it
- This opens Dream Lab — a dedicated image generation interface
- Type your detailed prompt in the large text box
- Set your style, aspect ratio, and quality preferences before generating
- Click Generate — Dream Lab produces higher-quality results than Magic Media, especially for complex scenes
- Add the image to an existing design or create a new design around it
Canva AI Image Generator Prompt Formula + Real Examples
The single biggest factor in getting good results from the Canva AI image generator is how well you write your prompt. Most users write 2–3 words and get generic results. Here is the exact formula that works:
Side-by-Side Examples — Bad Prompt vs Good Prompt
Power Words That Instantly Improve Canva AI Results
- Lighting: golden hour, soft window light, studio lighting, backlit, moody shadows, candlelight
- Quality: 4K, ultra detailed, high resolution, sharp focus, professional photography
- Camera: bokeh, shallow depth of field, wide angle lens, close-up portrait, aerial view
- Mood: dramatic, serene, cozy, energetic, mysterious, vibrant, minimalist
- Style: photorealistic, cinematic, watercolor, editorial, flat illustration, concept art
Canva Free vs Pro — What You Actually Get for AI Images
| Feature | 🆓 Canva Free | 🔵 Canva Pro ($15/mo) | 🎓 Education (Free) |
|---|---|---|---|
| Magic Media generations | 50 per month | 500 per month | Unlimited |
| Dream Lab access | ❌ Not included | ✅ Included | ✅ Included |
| Background Remover | ❌ Not included | ✅ One-click removal | ✅ Included |
| Magic Edit (AI inpainting) | ❌ Not included | ✅ Included | ✅ Included |
| Magic Eraser | ❌ Not included | ✅ Included | ✅ Included |
| Premium templates | Limited access | 100M+ templates | Full access |
| Brand Kit | 1 basic brand kit | Unlimited brand kits | Unlimited |
| WebP export | ❌ | ✅ | ✅ |
| Storage | 5GB | 1TB | 1TB |
💡 Our Verdict on Canva Free vs Pro
The free plan is excellent for most casual users — 50 AI generations per month is more than enough if you are creating a few pieces of content per week. Upgrade to Canva Pro ($15/month) if you need Background Remover, Magic Edit, unlimited generations, or Dream Lab. If you are a student or teacher, always use the free Canva Education plan — it gives you everything Pro offers at zero cost.
8 Pro Tips to Get Better Results from Canva AI Image Generator
- Use “Inspire Me” to learn prompt structure. Click the Inspire Me button in Magic Media when starting out. Study how Canva’s example prompts are written — they show you exactly how much detail is needed and what keywords to include.
- Generate 4 images per prompt, pick the best, then generate 4 more like it. After generating, hover over your favourite result → click the three dots → select “Generate more like this”. This keeps the best elements of your favourite image while exploring variations.
- Match the AI style to your brand identity. If your brand uses warm, natural tones — always use Photo or Watercolor styles. If your brand is bold and digital — use Neon or Filmic. Consistency builds recognisable visual identity.
- Combine AI-generated images with Canva templates. The most professional results come from: generate an AI background image → drop it into a matching Canva template → replace the template’s image → add your text and logo. Five minutes to a polished, on-brand design.
- Do not over-describe colour. Mentioning too many specific colors confuses the AI. Instead of “red, blue, green, and yellow background” — say “vibrant multi-color” or just describe the dominant mood colour you want.
- Use Magic Edit to fix specific problems. If you get a great image but one part is wrong — a hand looks strange, the background color is off, or there is an unwanted object — do not regenerate the whole image. Use Magic Edit (Pro) to repaint just that area with a text instruction.
- Layer AI images with Canva graphics. Generate your AI image → add transparent Canva stickers, icons, or illustrated elements on top. This hybrid approach produces unique results that look completely custom and on-brand.
- Try DALL·E inside Canva for photorealism. When Magic Media is not producing realistic enough results, switch to DALL·E. In the editor, click Apps → search “DALL·E” → use the same prompt. DALL·E produces notably more photorealistic output for human subjects, food photography, and real-world scenes.
What to Use Canva AI Image Generator For — Real Use Cases
| Use Case | Best Style | Recommended Aspect Ratio |
|---|---|---|
| Instagram post background | Photo or Dreamy | 1:1 square |
| YouTube thumbnail background | Filmic or Neon | 16:9 landscape |
| Blog header image | Photo or Illustration | 16:9 or 4:3 |
| Instagram Story or TikTok | Dreamy or Neon | 9:16 portrait |
| Pinterest pin image | Watercolor or Photo | 2:3 portrait |
| Presentation slide background | Minimalist or Illustration | 16:9 landscape |
| Facebook ad creative | Photo or Filmic | 1:1 or 4:5 |
| Product mockup background | Photo | Matches product ratio |
How Canva AI Image Generator Compares to Alternatives
The Canva AI image generator is excellent for designers who want an all-in-one workflow, but it is not the most powerful standalone AI image tool. Here is how it compares and when you might want to use something else:
✅ Choose Canva AI When…
- You want to generate AND design in one tool
- You need ready-to-use social media templates
- You are a non-designer who needs results fast
- You need YouTube thumbnails, Instagram posts, or presentations
- You want free AI generations with no extra signup
⚠️ Consider Alternatives When…
- You need maximum image quality — use Leonardo AI (150 free/day)
- You want the most artistic, cinematic results — use Midjourney
- You need text perfectly rendered inside images — use Ideogram
- You need 100+ images per day free — use Playground AI
See our full comparison of the best free AI image generators in 2026 — including how Canva ranks against 9 other top tools. And if you create YouTube content, check our dedicated guide on the best AI tools for YouTube thumbnails — Canva ranks #1 for a reason.
Frequently Asked Questions
Is Canva AI image generator free?
Yes. Canva’s AI image generator (Magic Media) is available on the free plan with 50 image generation credits per month. Each credit generates 4 image options, so you effectively get up to 200 images to choose from per month at no cost. No credit card is required to sign up and start generating images.
How many free AI images can I generate on Canva per month?
On the Canva free plan, you get 50 AI generation credits per month. Each credit produces 4 image variations from a single prompt, so you get up to 200 images to choose from per month. Canva Pro subscribers get 500 credits per month, and Canva for Education users get unlimited generations for free.
What AI model does Canva use for image generation?
Canva uses three different AI models for image generation. Magic Media (the main tool) is powered by Stable Diffusion. Dream Lab uses a more advanced proprietary model for higher quality output. DALL·E by OpenAI is also available inside the Canva editor through the Apps section, and Imagen by Google Cloud is available as a fourth option.
Can I use Canva AI generated images commercially?
Yes. According to Canva’s content license, AI-generated images created using Magic Media are available for commercial use on both free and Pro plans. This means you can use them in client work, ads, products, and paid content. Always review Canva’s current terms of service as policies may be updated.
How do I access Dream Lab in Canva?
Dream Lab is accessed from the Canva homepage, not from inside a design. Go to canva.com, click the search bar at the top, and select “Create an image” from the dropdown options that appear. This opens Dream Lab — Canva’s advanced AI image generator with more upfront style and quality controls. Dream Lab is a Canva Pro feature available with the $15/month subscription.
Why are my Canva AI images not good quality?
Poor quality Canva AI images are almost always caused by vague prompts. Instead of “a dog on a beach”, write “a golden retriever running on a sandy beach at sunset, photorealistic, soft warm light, shallow depth of field, 4K”. Adding style (photorealistic, cinematic), lighting (golden hour, studio light), and quality keywords (4K, ultra detailed) to your prompt dramatically improves results. Also try the Filmic or Photo style setting for the most realistic outputs.
Is Canva AI image generator better than Leonardo AI or Midjourney?
Canva AI is not the most powerful standalone image generator — Leonardo AI and Midjourney both produce higher quality images. But Canva’s huge advantage is its all-in-one workflow: you generate an image and immediately use it in a design without switching apps. For creators who want to design social media posts, thumbnails, and graphics quickly, Canva AI is the most practical choice. For maximum image quality with 150 free generations daily, use Leonardo AI alongside Canva.
🚀 Ready to Start Generating Images with Canva for Free?
Go to canva.com, sign up free, and generate your first AI image in under 2 minutes.
For even more image quality, combine Canva with Leonardo AI — both are completely free to start.
Bookmark CrixPix.com for daily, honest guides on every AI tool that matters in 2026.